Sign up with socials

One of the best things about Laravel is the simplicity provided by packages like Laravel Socialite, something complex and time consuming such as authentication with Social Accounts(Amazon, Apple, Google, Facebook, LinkedIn).
Installing socialite:
composer require laravel/socialiteThe best part is if there isn’t a provider included in the package itself it can be found here a huge list of providers that can be installed as simple as:
composer require socialiteproviders/<package-name>Adding the required fields:
'<provider-name>' => [
  'client_id' => env('PROVIDER_CLIENT_ID'),
  'client_secret' => env('PROVIDER_CLIENT_SECRET'),
  'redirect' => env('PROVIDER_REDIRECT_URI')
],
Those are the two main things that has to be present regardless which provider is. Depending on the provider there could be more required data.
Where can those ID’s be obtained ?
After you created an app(you can find the steps here) you need to navigate to
https://console.cloud.google.com/auth/clientsand select the client you’ve created above, you land on a page like this:
Press enter or click to view image in full size
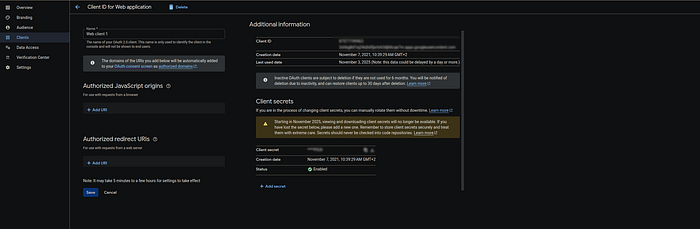
the credentials for authentication can be found on the right under: Additional Information on the left section under the settings its important to add the URL you did or will create for the client above this link should be added in Authorized redirect URIs this way you will be able to authenticate you project in order to use the login functionality.
Very similar to what is required from Google, you also need to create app which will be used for access point, you can do that. In order to create new app or any app in the matter you need to developer account(Same applies for the rest of the providers) after you’ve done that you need to go to
https://developers.facebook.com/apps/You will see a button Create App which will open a wizard showing the information needed for the app
Press enter or click to view image in full size
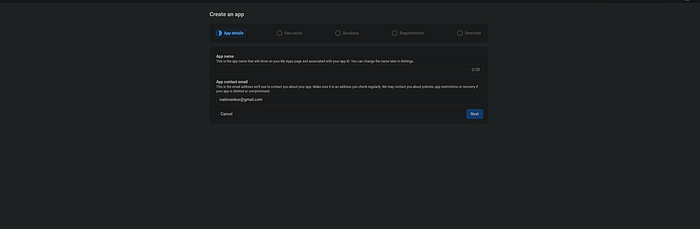
pretty simple and straight forward following the steps you end up in creation of the app, after which you need to navigate to:
https://developers.facebook.com/apps/select your app from and open the basic setting page there you will see the client_id and client_secret that you need.
Most of the providers (Google, Facebook, LinkedIn) have the same easy to do flow of creating developer account, creating app and obtaining the required keys, except Apple…
They have a hectic process even for something simple as creating a developer account which involves waiting approve who knows how long and a small matter of paying $99…yeah…
So let’s jump into it…
Apple
After you create and get your account approved(hopefully) you still need to obtain half of the keys you need, for this part you can see this beautiful article by Octa, it gets into the great depths showing what you need to create, how and where.
The second part that is Laravel specific can be found in this crafty article by James Bannister, it could be tad outdated, but is immensely helpful, one thing that I found is in the way the SHA256 class is used when biding it in the AuthServiceProvider.php
 $this->app->bind(Configuration::class, fn () => Configuration::forSymmetricSigner(
        Sha256::create(),
        InMemory::plainText(config('services.apple.private_key')),
    ));
but in the newest version(of time of writing) it should be:
 $this->app->bind(Configuration::class, fn () => Configuration::forSymmetricSigner(
        new Sha256,
        InMemory::plainText(config('services.apple.private_key')),
    ));
since there is now create method in the class itself or it’s parent class.
So after all this is sorted out, let’s get to the fun part: the coding
The main things you need to have:
Redirect routes
Callback routes
Controller to handle them
So starting with the routes more often than not they will look somethi likes this:
// web.php

Route::get('/auth/google/redirect', [SocialiteController::class, 'googleRedirect']);
Route::get('/auth/google/callback', [SocialiteController::class, 'googleCallback']);

Route::get('/auth/facebook/callback', [SocialiteController::class, 'facebookCallback']);
Route::get('/auth/facebook/redirect', [SocialiteController::class, 'facebookRedirect']);

Route::get('/auth/apple/callback', [SocialiteController::class, 'appleCallback']);
Route::get('/auth/apple/redirect', [SocialiteController::class, 'appleRedirect']);
the redirect route is the endpoint that will be called sending the keys from the configuration this is a provider’s page, the callback route is the route in your application which will handle the Authentication process:
/**
 * Checking if the user already exists and creating new one if necessary,
 */
    public function googleCallback()
    {
         $googleUser = Socialite::driver('google')->stateless()->user();

         $user = User::updateOrCreate(
             ['google_id' => $googleUser->id],
             [
                'name' => $googleUser->name,
                'email' => $googleUser->email,
                'google_id' => $googleUser->id,
                    ...
             ]
         );

         Auth::login($user, true);

         return redirect('/');
    }
/**
* Redirects the user to the Google Page to authenticate.
*
* @return mixed
*/
public function googleRedirect()
{
return Socialite::driver('google')->stateless()->redirect();
}in this case I’m using stateless it’s a method may be used to disable session state verification, for applications that not use session based authentication in my case that is SPA.
And once again that bring us back to Apple…
In order to use Laravel Socialite with apple provider you need to install it additionally:
composer require socialiteproviders/applemore on the configuration you can find here.
As it can be read in the article regarding how the client_secret should be generated, if out opt out to generate it on every request, you need to make one change:
use App\Services\AppleToken;
use Laravel\Socialite\Facades\Socialite;

public function handleCallback(AppleToken $appleToken)
{
    config()->set('services.apple.client_secret', $appleToken->generate());

    $socialUser = Socialite::driver('apple')
        ->stateless()
        ->user();

    // Further actions you want to take in your app...
}
The most important thing to remember about this is to do the setup right, regarding the links from which you will try the authentication, for Google(assuming it applies to the rest of the providers) you cannot use links:
your-app.test
127.0.0.1::8000
For those two I’m positive that won’t work, it can’t be even added there is validation that is stopping you, except for Apple…they allow it and the when you implement everything it blows up in your face…
Conclusion
There are variety of branding settings for the apps that can be made it all in your hands, make count.
Share this post